
The canvas
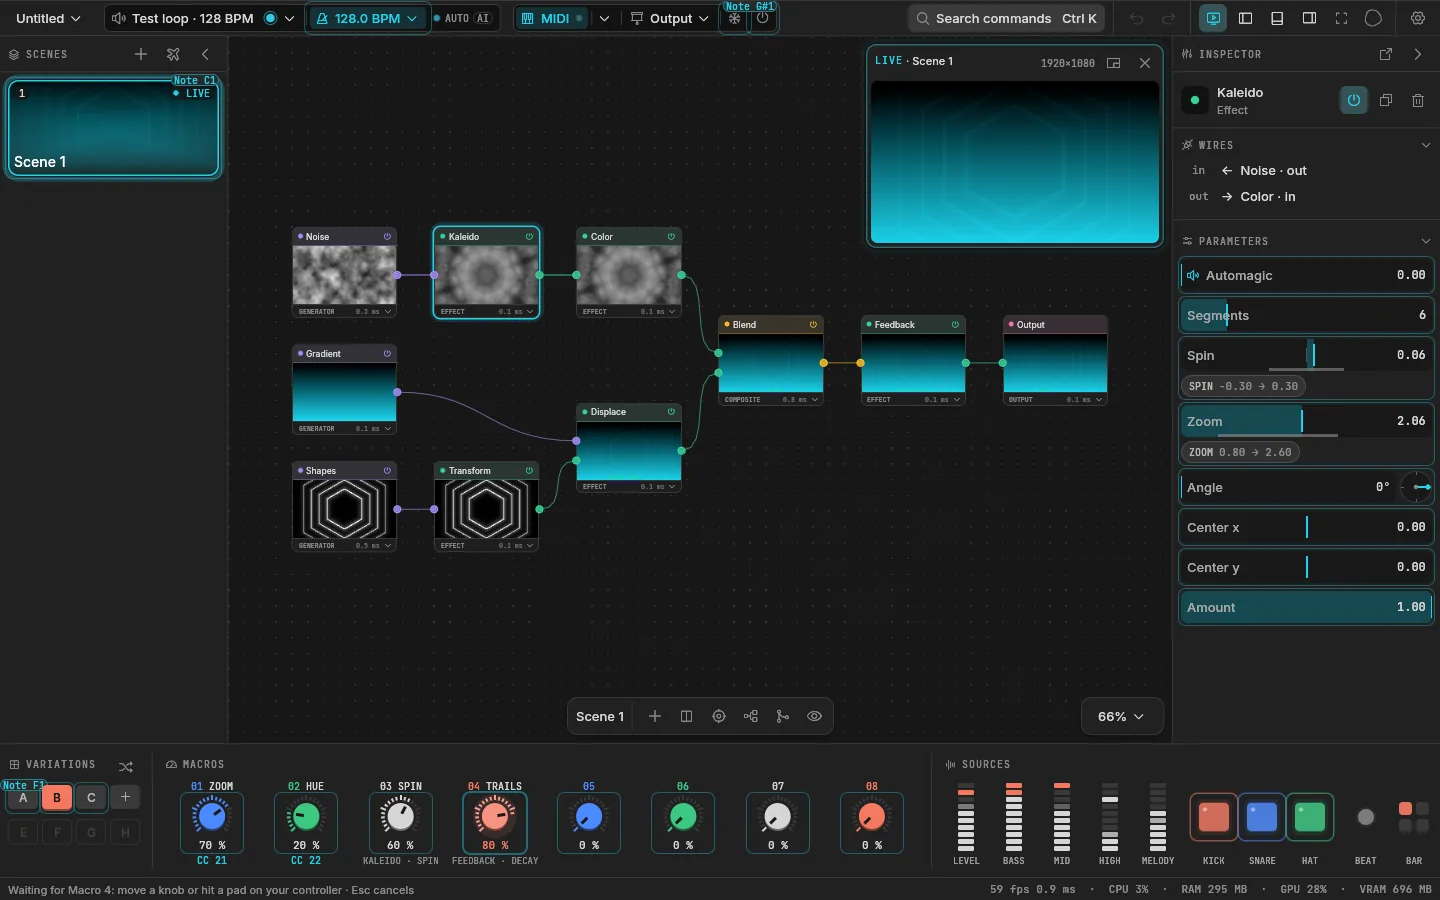
The canvas is where you work: the selected scene's graph on an endless plane. It works the way TouchDesigner does, with Figma's feel for moving around. Every node is a card that shows what it makes, and wires carry pictures from outputs to inputs.
Moving around
| To | Do |
|---|---|
| Pan | Hold Space and drag, or drag with the middle button, or scroll |
| Zoom | Ctrl and scroll (Cmd on a Mac), or pinch |
| See every node | H or Shift 1 |
| Zoom to the selection | Shift 2 |
| Zoom to 100 % | Shift 0 |
| Zoom in or out | Ctrl = and Ctrl - |
The zoom eases about the pointer, up to 8 times, and never further out than the view that shows every node. The zoom menu sits in the canvas's bottom right corner.
Nodes
A card has three parts: a header with its icon and name, its content (its picture, or a signal's curves and meters) and a footer with its kind, what moves it, and a chevron that drops its values down right on the canvas.
The groups in the node menu:
| Group | Nodes |
|---|---|
| Generators | Noise, Gradient, Shapes, Waveform, Shader (with 40 presets), Image, Video, Live (NDI, Spout and cameras in), Media List, Text, Text List, Particles, Mesh |
| Effects | Transform, Kaleido, Color, Blur, Feedback, Displace, Opacity, Levels, Threshold, Edges, Channels, Crop, Polar, UV Map, Lookup, Freeze, Time Machine, Key, Luma Blur, Shader FX (with 25 presets, from Glitch and VHS to LED Wall, God Rays and Shake) |
| Composite | Blend, Mask, Merge |
| Control | Switch, Grid, Layer Stack |
| Output | Output |
| Signals | Audio In, Beat, Beat Kick, LFO, Time, Random, Probe |
| Logic | Remap, Math, Envelope, Counter, Sequencer, Sample & Hold, Toggle, Compare, Timer, Smooth, Quantize, Speed, Delay, Spring, Slope |
Each node's line in the menu says what it does, and the inspector shows its values once it's selected. Generators, effects and composites make pictures; signals and logic make numbers, which move values (see Signals and jacks).
Adding one
- Tab opens the node menu. Type to search, ↑ ↓ to choose, Ctrl Tab to move between groups, Enter to add, Esc to close. A search dims the groups it leaves empty.
- With a node selected, the new one is added after it and wired from it. Its footer in the menu says which node it will follow.
- Double-click the empty canvas to add a node where you clicked.
- Drag a wire out of an output and let it go on empty canvas: the menu opens, and the node you pick is wired from it.
- Drop a picture, a GIF or a folder of frames on the window to add it as an Image node; several files at once come in together. An ISF shader (
.fs,.fragor.glsl) dropped the same way becomes a Shader node.
Changing one
- Click a node to select it; Shift and click to add to the selection; Esc to deselect.
- Double-click a node, or click its name in the inspector, to rename it.
- E turns the selection off or on, as does a card's power button. A picture node that's off passes its first input through (black if nothing is wired in); a signal that's off moves nothing. The Output stays on.
- Ctrl D duplicates the selection, Delete deletes it.
- Right-click a node for its menu: Parameters (its values dropped down on the canvas), Rename…, Duplicate, Turn off, Replace with…, Disconnect and Delete.
- Replace with… turns a node into another kind where it stands. Its values and links stay where they fit.
- Every node shows what it costs the GPU, in milliseconds, in its footer.
Wires
Drag from an output (on a card's right edge) to an input (on the left edge), or back from a free input to an output. Near a port the wire may go into, a bubble grows round it and the wire's end melts in; the nodes it can't go into fade. Let go there and it snaps in.
An input takes one wire: wiring another into it replaces the first. To unplug a wire, drag its end out of the input and let it go on empty canvas: it springs back into its output.
Click a wire to open its popover: where it comes from and which input it goes into, both changeable, Insert a node to put one in between, and Remove.
The toolbar
The bar at the bottom of the canvas, from the left:
| Button | What it does |
|---|---|
| The scene's name | Which scene's graph this is |
| + | Add a node (Tab) |
| Split | The picture beside the nodes, under them, or off (Ctrl Shift P) |
| Zoom to fit | Every node in view (H) |
| Arrange | Lays the graph out for you |
| Tie | Turns a plain drag into a line that ties cables (Cable ties) |
| Eye | Hides the nodes: the picture alone behind them |
Arrange
Arrange lays the graph out left to right: signals first, the Output last, each node level with what it's linked to, so linked nodes stay close. A node nothing feeds goes just before the first one it feeds. It also ties the cables that leave one output or meet at one node. The nodes slide into their places, and the whole move is one undo step.
Hide the nodes
The eye hides every card and wire, so the canvas shows the scene's picture alone, full size behind where the nodes were. Click it again to bring them back.
Split and panels
Split shares the window between the nodes and the picture: beside them, under them, or off, with the edge dragged to share it. Split, the inspector docks at the nodes' edge.
The panels around the canvas each hide with a key: Ctrl B the scenes, Ctrl Alt B the inspector, Ctrl J the macros and sources, and \ all of them at once. Ctrl Shift B puts the inspector in a window of its own.